Mackenzie is new to the hobby and shows a lot of enthusiasm. It wasn’t too long ago that I was explaining parts of the game to him. Mackenzie has played a lot of games and it shows. We’ve played a few games now and it usually ends with one of us schooling the other. We played this game a couple of weeks ago. I wanted to get this report up sooner but work and life took over. My memory will not be as fresh but I will try my best. I took a lot of aerial shots. I have pictures of another game with more close up. Any suggestions on improving my battle reports are appreciated. Leave a squawk in the comments section.
I have three walking Hive Tyrants and I haven’t played with them for as while. I wanted to play with all three so the Leviathan supplement allowed me to do that. A lot of times I design my lists over models I haven’t played with for a while and I could care less about synergy. We played a Maelstrom Mission. I will update when I have the rule book in hand.
Tyranids- Hive Fleet Kodiak
HQ
Hive Tyrant
- Relic venom cannon (forget name, will update when Codex in hand), lash whip and bonesword
- Warlord (Preferred Enemy)
- Powers- Dominion (+6″ synapse), Onslaught (unit can run + shoot), Paroxysm (-D3 WS + BS)
- 2 Tyrant Guard (scytals and rending claws)
Hive Tyrant
- One pair twin-linked devourers, lash Whip and bonesword
- Powers- Dominion, Onslaught, Catalyst (Feel No Pain)
- 2 Tyrant Guard (rending claws, lash whip and bonesword)
Swarmlord
- Powers- Dominion, Onslaught, Psychic Scream (6″ nova, 2D6+2 subtract Ld), Warp Blast
- 2 Tyrant Guard (rending claws, lash whip and bonesword)
Troops
Termagaunts with fleshborers (10 models)
Termagaunts with fleshborers (10 models)
Hormagants (14 models)
Tau- Farsight Enclave
HQ
1 Cadre Fireblade Commander Farsight (Warlord)
Elites
XV104 Riptide (ion accelerator, smart missile system)
Troops
Fire Warrior team with Shas’ui (12 models)
XV8 Crisis Team with Shas’vre (3 models, twin-linked fushion blaster, plasma rifle)
Fast Attack
Pathfinders (6 models)
Heavy Support
Broadsides (3 models, rail rifles, smart missiles)
Broadsides (3 models, high yield missiles, smart missiles)
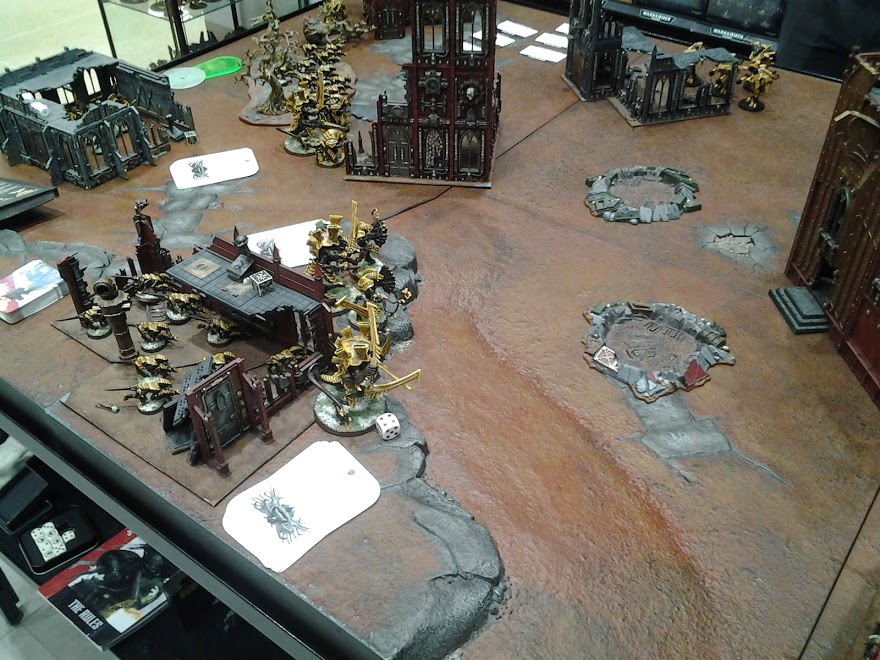
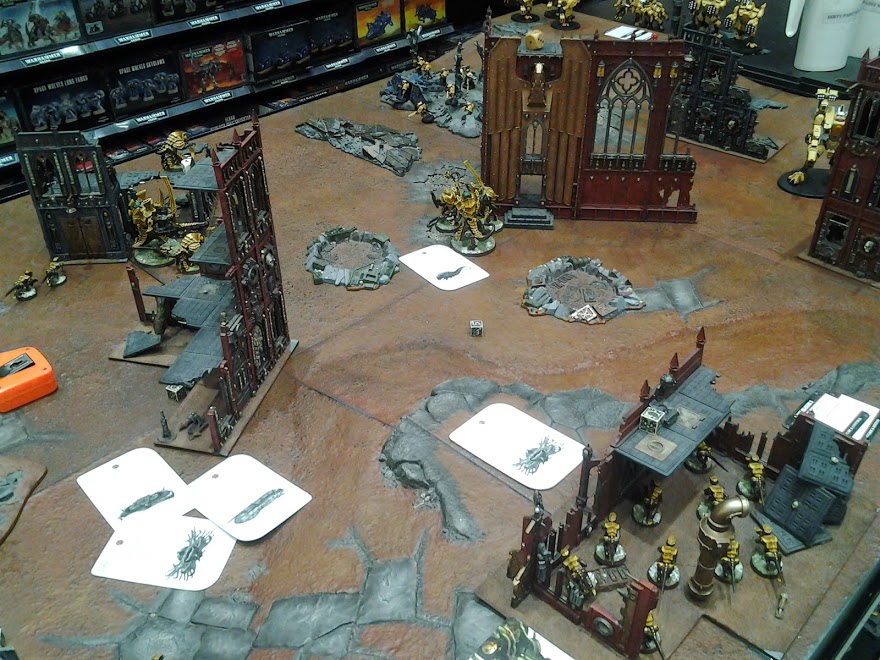
I win the pleasure of going first. I use the Shrine in the middle for some cover for Tyrant with Devourers and Swarmlord. Hormagants will storm with the Swarmlord. I place some Termagaunts in cover behind to hug an objective. Warlord Tyrant is set-up to the left with some Termagaunts hissing and snapping.

Mackenzie places his Riptide to his left with clear line of sight to my right flank. 3 Broadsides with high yield missiles perch in the ruins to the right of the Riptide. 3 Broadsides with rail rifles are in the back corner. Fire Warriors hide behind the Shrine. Farsight and Crisis Suits on the right flank with Pathfinders.

Mackenzie rolls to seize and shazam a 6! That’s fair. Our last game I seized with my Grey Knights and Assassins. In fact, three of my last five games have been seized.
Tau Turn 1
Mackenzie lights up my right flank. I lose all Hormagants, the Swarmlord’s Tyrant Guard and two wounds on Swarmy. Scooby-doo said it best- Ruh-roh! Farsight moves towards the ruins but cannot claim and objective. Fire Warriors claim the objective in the Shrine. Tau administer First Blood.

Tyranids Turn 1
Hive Tyrant with Devourers storms the Shrine. Swarmlord goes on a suicide mission and moves to the Riptide. Onslaught is cast on the left flank Termagaunts. Feel No Pain cast on two Hive Tyrants. Paroxysm cast on Farsight. Shooting removes three Fire Warriors. Warlord claims the objective in the ruins. I successfully cast three psychic powers but roll a 1 on the D3. Tie 2-2.

Tau Turn 2
Shooting removes the Swarmlord and a majority of the left flank Termagaunts. What I expected. Farsight claims an objective for a point.

Tyranids Turn 2
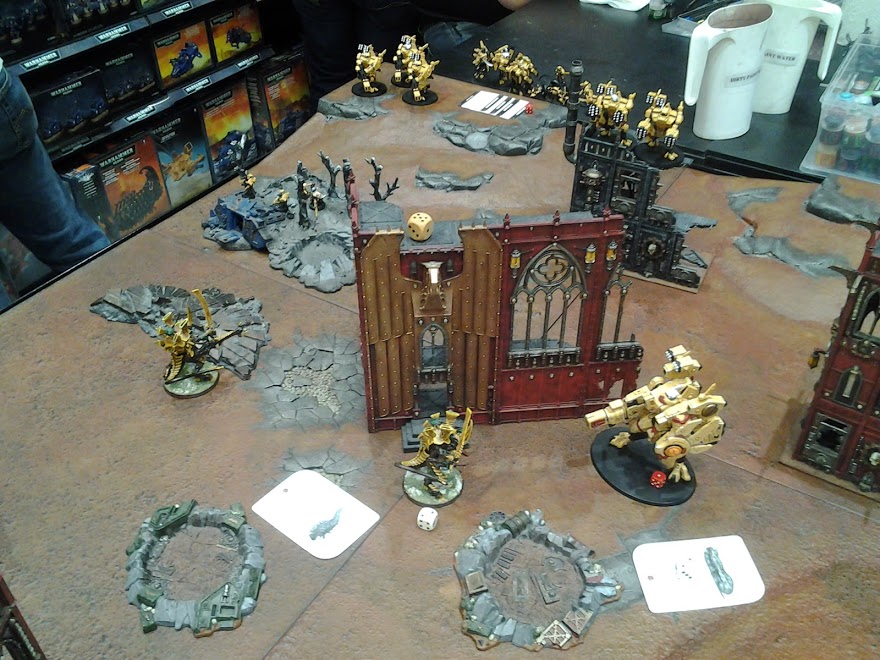
Paroxysm is cast on Farsight. Catalyst is cast on the Devourer Hive Tyrant. Warlord uses flamer option for relic venom cannon and causes a wound. Devourer Hive Tyrant shoots the Pathfinders and causes enough wounds for them to break and run off the board. Termagaunts charges Farsight and fail the charge. None are killed with overwatch. Warlord Hive Tyrant charges Farsight and is royally pissed with a roll of 12. I issue a challenge and Farsight accepts. Farsight does no wounds and is insta-killed with the bonesword. The Crisis Suits do one wound on the Guard and then get ripped to shreds. I score a point for Warlord and receive three points for issuing a challenge. 5-3 for Tyranids.


Tau Turn 3
Tau pick on the Devourer Hive Tyrant. Both Guard are removed as casualties and the Tyrant takes a wound. Feel No Pain was useless. Warlord Hive Tyrant loses a Guard. Riptide and Broadsides dispose of Termagaunts hiding in my backfield. Fire Warriors dispose of remaining two Termagaunts that were drooling over Farsight’s remains. Riptide claims an objective. 5-4 for Tyranids.

Tyranids Turn 3
This is the TSN turning point. For those of you who do not live in Canada TSN is a sports network and during a televised game they will pinpoint a moment that defines when a team wins the game. This is that round. Devourer Hive Tyrant is the closest model to the objective in the Shrine. I have three cards for that objective so I chose the cards over combat with the Riptide. I also have to control the objective in the ruins that the Warlord Hive Tyrant had just slain Farsight. The Warlord is hangry for biomass and books it for the Fire Warriors. The Fire Warriors are recipient to Paroxysm and both Tyrants have Feel No Pain. 8-4 for Tyranids.

Tau Turn 4
Nothing is accomplished. I make cover and feel no pain saves. Wow, I finally made feel no pain.
Tyranids Turn 4
Devourer Hive Tyrant attempts to assault the Riptide and trips on its own tail. Warlord Tyrant is creeping up on Fire Warriors removing some in shooting. 8-4 for Tyranids.
Tau Turn 5
Warlord Hive Tyrant is reduced to one wound. Riptide moves back from Devourer Tyrant. Mackenzie is needing to table me for the win.

Tyranids Turn 5 and Final Thoughts
I move the Warlord to the Shrine in hopes to hide it. Devourer Hive Tyrant moves towards Riptide, loses a wound in overwatch and trips over its tail again. Mackenzie rolls for random game length and we are going for one more round. Ruh-roh. Tau Turn 6 Game over. Tyranids have been vanquished. So my mistake was running the Warlord up. Had I gone back to the objective I would have claimed a point and would have hidden the Warlord from line of sight. The two Termaugaunts would have scuttled to the adjacent ruins and too been out of sight. I got a wee bit blood thirsty. All-in-all a fun game.
Next report- 1850 Tyranids vs Khorne Daemonkin. It’s bloody.


Nice report. I think the one way to really improve things is to add captions to some of the pictures saying what is hapepning/just happened in some of them.
Other than that bigger pictures on the blog itself could help.
LikeLike
By: Thousand Eyes on May 26, 2015
at 4:07 am
I enlarged the photos. It messed up the formatting but I think that problem has been solved. If you click on the photos it will bring up a larger photo.
I will think about the captions. I may put some in. I will try put in some more narrative/close-up shots of the battles.
LikeLike
By: Turkadactyl on May 27, 2015
at 4:09 pm