I showed up for a random game and Darrell and I drew the short straw. Darrell is a tough player to play against. He has a talent of designing some challenging lists to play against. I have been on the receiving end of a Darrell beat down a few times. Will the Tyranids prevail and add some space clowns to the DNA? Will the Harlequins laugh the whole way to the bank? Read more to find out.
This will be my second game against Harlequins. I wish more people played this army. The models are gorgeous. I wouldn’t mind collecting them myself. I think painting them will be a blast. I have to keep reminding myself that I have five more armies that I have to finish first before starting another.
Tyranids- Hive Fleet Kodiak
HQ
- Tyranid Prime- lashwhip and bonesword, devourer, Warlord- It Will Not Die and Fearless
- Death Leaper
Troops
- Termagants (30 models)- fleshborers
- Termagants (30 models)- fleshborers
Elites
- Malanthrope
Fast Attack
- Raveners (3 models)- scything talons, rending claws
- Raveners (3 models)- scything talons, rending claws
Heavy Support
- Carnifex (2 models)- dual twin-linked devourers
- Mawloc
Harlequins
Elites
- Death Jester
- Shadowseer- Psychic powers- Veil of Tears, Mirror of Minds, Shards of Light
Troops
- Troupe (12 models)- fusion pistol x2, disruptor pistol x2, harlequin’s caress x2, harlequin’s embrace x2, harlequin’s kiss x2, shadow mask, Warlord (Troupe Master)- warlord and unit gets a free turn at the end of the game if the warlord is still on the table
Fast Attack
- Skyweavers (2 models)- didn’t get the loadout
- Skyweavers (2 models)- didn’t get the loadout
- Skyweavers (2 models)- didn’t get the loadout
Heavy Support
- Voidweaver (2 models)- didn’t get the loadout
Eldar Ally (Darrell didn’t have a printout of his Eldar and I can’t remember the wargear)
HQ
- Autarch (Had nasty wargear to augment the Harlequins powers)
Troops
- Rangers (5 models)
Heavy Support
- Fire Prism
We roll for mission and play Eternal War- Big Guns Never Tire. Night fight will be in effect for the first round. We place the objectives and I win the honour of deployment. Whoever deploys first will also get first turn. I choose deployment since with the three objectives close together. Darrell’s guns have range on me so I don’t want him getting too comfortable nestling into his own end.
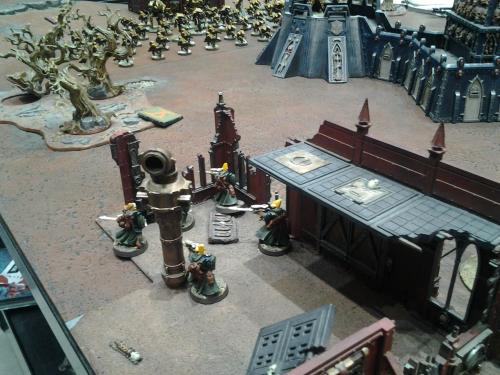
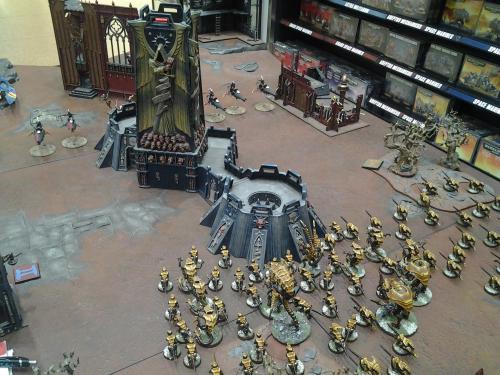
I spread everything out to avoid massive casualties from blast templates. Every unit has at least one model within six inches of the Malanthrope to take advantage of its spore cloud. I face one brood of Termagants backwards to distinguish it from the other brood. Darrell spreads his units out so Death Leaper cannot get too close with the infiltration. I like to be aggressive with Death leaper but Harlequins cause me to be cautious. They can close the gap fast. I wanted to use Death Leaper as a homer for the Mawloc. That won’t happen today. Death Leaper hides out in the Fortress of Solitude a few inches ahead of the front line.
Darrell spreads his army out. He knows a Mawloc is in play and wants to minimalize its damage. The Rangers infiltrate int the building to take advantage of the cover.
Let’s get ready to RUMBLE!
My turn is not exciting. I move everything up. Thanks to Move Through Cover everything advances their full movement. The Death Leaper hops down to join its brethren. The run rolls are poor.
Harlequin Turn 1
Darrell re-positions some models and stays put. The Shadowseer advances in order to use Shard of Light (Assault 3D6 Str. 3) and only causes one wound on the Termagants. My cover saves range from 2+ to 4+. When the dust settles after the shooting phase a total of 5 Termagants bite it and two wounds are removed from a Ravener.
Tyranids Turn 2
The Mawloc emerges from beneath. Darrell spread his Troupe out so I decided to pick on some vehicles. It takes the Mawloc two attempts make enough room above ground. One Voidweaver explodes while one Skyweaver is destroyed. Another Skyweaver takes one wound. The Termagants kill one Ranger in shooting. Everything else runs forward.
Harlequins Turn 2
The Shadowseer casts Veil of Tears on the Troupe. If I choose to shoot the Troupe I have to roll 2D6x2 and if the Troupe is not in that distance my unit forfeits it chances to shoot that turn. Darrell spreads out his shooting killing one Termagants, kills one Ravener and wounds the Mawloc three times. The Troupe charges the Mawloc.
The Mawloc didn’t stand a chance.
Harlequins are up 2-0 with First Blood and a point from slaying a heavy support.
Tyranids Turn 3
The Tyranids advance forward.
The Termagants shoot the Rangers, who go to ground. One Ranger is slain.
One Dakkafex is in range of the Voidweaver and explodes the vehicle. Three Troupe members perish and the Autarch takes a wound as a result of the explosion.
The two Ravener broods charge the Troupe. One brood fails the charge. For the other brood one is instantly killed to overwatch and Harlequins don’t even break a sweat dispatching the second in hand to hand combat. The Termagants charge the Rangers and wipe the unit out.
Tyranids score a victory point for destroying the unit of Voidweavers. Score is 2-1 for the Harlequins.
Harlequins Turn 3
The Shadowseer casts Mirror of Minds on the Dakkafex brood and kills a Dakkafex. Darrell and I both roll a D6 and add it to our respective models leadership values. If the score is a draw or the Shadowseer rolls higher than the target model loses a wound. We repeat the process until the target model is slain or my value is higher. The Autarch has a -2 leadership modifier so it is impossible for me to win. Nice power.
The Harlequins shoot the Raveners and kill one. They multi-charge the Raveners and the Death Leaper and kill both in combat.
The Skyweavers charge the Termagants and kill nine.
Tyranids Turn 4
The Prime and brood of Termagaunts shoot the Troupe and kill one. They charge and the Death Jester is killed in the duel. The Troupe does not kill too many Termagants since they did not charge. The Troupe pulls a hit and run to get out of combat.
In the other combat the Termagants manage to destroy a Skyweaver while losing five in the process. The Skyweavers hit and run and land close to the Malanthrope.
Harlequins Turn 4
The Shadowseer casts Shards of Light on the Prime and brood and kills the five Termagants and puts a wound on the Prime. The Fire Prism shoots the larger brood and kills five Termagants.
The Troupe charge the Prime and kill it with impact hits. The Skyweavers charge the Malanthrope and kill it with impact hits. The Tyranids are now without synapse.
Tyranids Turn 5
The Dakkafex fails its instinctive behaviour test and heads straight for the Troupe. Sadly in its rage it cannot fire its guns. The Termagants pass their instinctive behaviour and advance towards the Troupe. Both broods charge and the Autarch and two Troupe members are killed. The Dakkafex takes three wounds in the process and two Termagants are retired. The Termagants fail their leadership and run towards the Skyweavers. The Harlequin’s hit and run away from combat.
Harlequins Turn 5
In the spirit of Looney Tunes that’s all folks. The Harlequins wipe out the Tyranid menace.
I now fall 0-2 to Harlequins. Wow, they sure do hit hard when they charge. I was hoping to overwhelm Darrell with my numbers but that was not the case. Next time I will focus the Mawloc on the Troupe. Darrell was also able to easily dispatch my Raveners. I have to overwhelm the Harlequins in combat with more broods making it into combat at the same time. My short-range firepower didn’t help much either. It was a fun game. I felt like I had a chance for most of the game. It was also a treat to play an army that I hardly get to see on the tabletop. Darrell usually crushes me by turn three or four so to be tabled in five turns is a minor victory, right?


Great bat rep, the Space Clowns look like a fun army to both field and face.
LikeLike
By: Thomas on April 19, 2016
at 2:41 am
I’ve enjoyed both games I’ve played despite the beatdowns. The sculpts are fantastic and their style of play is unique to any other army. My advice is don’t let them charge. They are fragile to shooting. My list had a lot of shooting but at a 12″ range so I couldn’t capitalize.
LikeLiked by 1 person
By: Turkadactyl on April 19, 2016
at 9:46 am
12″ is nothing really when facing a fast assault army.
LikeLike
By: Thomas on April 19, 2016
at 10:18 am
For sure. Darrell is a good general and a fantastic list builder. He knows his armies strengths and weaknesses. His timing was spot on each round. His psychic powers were very complimentary to this game as well.
LikeLike
By: Turkadactyl on April 19, 2016
at 10:45 am
Really good report, nice to see 2 armies fully painted.
Never played against the space clowns yet.
Also it’s nice to see someone not using Dakka Flyrants! Even though they are normally auto includes for most Tyranid armies.
Anyway keep up the good work, look forward to the next battle report.
LikeLike
By: adamcrook2013 on April 19, 2016
at 7:38 am
I had to walk to the store so my list was determined by what I could fit in my bag. My Flyrant does not. I’ve played a few games with the Flyrant so I needed to change it up anyways.
I already had 60 Termagants packed so they were a must. Plus seeing 60 Termagants on the field at once is cool. I haven’t played with the Prime or Raveners for a while so it was time for them to make an appearance. I also like the look of the Prime whipping the little gribblies.
I’m a big fan of the Mawloc. I like the the fluff and the Deathleaper is a good delivery for the Mawloc, but not against Harlequins.
Glad you enjoyed the report.
LikeLiked by 1 person
By: Turkadactyl on April 19, 2016
at 9:55 am
I’m certainly not one for power gaming (being an Ork and Nid player). I’ve said it so many times I’d rather play a good close game than wipe the floor with my opponent even if it means I lose!
Look forward to more reports.
LikeLike
By: adamcrook2013 on April 20, 2016
at 8:41 am
Cheers. Will and I are planning on playing this weekend. They’ve always been good games. I may generate a batrep out of that game.
LikeLike
By: Turkadactyl on April 20, 2016
at 9:22 am
Ouch! That seemed like it was going so well for parts but that army has a lot of little nasty tricks doesn’t it.
I keep saying to myself I’d love to collect a small Harli force but I don’t have the money.
LikeLike
By: Thousand Eyes on April 19, 2016
at 1:59 pm
I think they get D3 per model impact hits on the charge at initiative 10. Then there is a whole lot of power weapon mixed with potential instant death. They have to be charged. I think next time the Troupe is a priority for the Mawloc.
LikeLike
By: Turkadactyl on April 19, 2016
at 2:45 pm
Looking forward to reading the rematch 😀
LikeLike
By: Thousand Eyes on April 20, 2016
at 1:07 am